Sparkler shots are one of my favourite additions to a wedding day. Not only are they a fun wedding activity for everyone to all get involved in, they’re very often among my couples’ favourite shots of the night, because they’re always so full of laughter and movement and energy. And if the weather has been horrible all day and couple portraits have been gloomy and drab, an epic sparkler shot can sometimes be the saving grace of a wedding gallery.

But they’re not as simple as you’d think to pull off, and I get asked by so many of my couples for tips on how to get the best sparkler shots. There are a few common mistakes I see time and time again, so I thought I’d put together a little how-to guide on how to absolutely nail the sparkler photo on your wedding day.
1. Safety first
Sparklers burn at 1600℃ and stay crazy hot for ages after they’ve gone out. They can easily cause a fire and you don’t want to burn down your venue!
Let your venue know in advance that you’re planning on doing a sparkler shot, and they can prepare a bucket of water for you. Any good venue will be prepared for this anyway, but it’s always better to let them know in advance as you’ll be too busy having fun to think about this sort of thing on the day.

2. Choose your timing carefully
As all the sparklers need to be lit at the same time, a sparkler shot can be a logistical challenge. This is made significantly more challenging if all the guests are drunk!
Ideally, the best time to do it is before the disco. It’s easier to gather everyone together (pulling people off the dancefloor is hard), and people are buzzing enough to have fun with it, but not so hammered they can’t work out how to use a lighter. It’s also a fun, exciting way to kick off the party section of the night.

3. Go by the sky (pitch black is best)
The main point of the sparkler shot, is of course, the photo. And so it’s critical you get the right light. A pitch black sky is best.
Here are some examples of different lights and colours of sky so you can see what I mean.
Black sky

Sparklers during Blue hour


Sparklers at dusk

But of course, depending on the time of year you’re getting married, this potentially causes conflicts with point number 2. If it’s dark outside before you start your disco, then perfect, best of both worlds. And that’s why sparkler shots are easier in the winter.
But if you’re getting married in the summer and it doesn’t get pitch black until 10 or 11pm, you’re inevitably going to have some guests who are a bit merry! You’ll probably be pretty drunk yourselves by then too! When making your decision, remember it’s better to have drunk guests and a black sky than sober guests and too much light.
4. Get long sparklers
Short sparklers burn out quickly. You’ll want to have a few chances to run down the tunnel, do different poses etc. so you’ve got more chances to get THE shot before the sparklers start to burn out.
So the 8” ones just aren’t long enough. It also takes time to get everyone’s sparklers lit, so with the shorter ones, the people who lit theirs first are often left waving burnt-out sparklers!
Ideally, you need 18” (45cm) sparklers. They burn for around two minutes, giving everyone a chance to get their sparklers lit, and still leaving you enough time to do different poses and have a few runs down the tunnel etc.

Here’s a link to the sparklers I have tried and tested that I know are perfect for the job:
5. Get decent sparklers, and get the right colour!
This is the most important tip. Sparkler shots can be very hit and miss, and I still get some sparkler shots that miss the mark. But most of the time, this is because people have bought cheap sparklers. So don’t try and skimp on sparklers, a few extra pounds make a massive difference. You need the right length (see above), and crucially, you need the right colour.
There are two main colours people usually go for. Silver and gold. With all my heart, I recommend the gold ones (here’s the link again). The silver ones burn kind of blue, and it makes for a completely different photo. The cheap silver ones also smoke a lot, and you’ll be hidden behind a cloud of fog.
The gold ones burn brighter, longer, and give a nice warm colour as they burn, giving you a much better photo all round. And the ones I’ve linked are pretty much smoke-free as well, so you get a much better clarity of shot because you’re not wading through fog!
Here are some examples of both so you can see what I mean.


A lot of DJs offer a sparkler package add-on, but be warned: they pretty much always buy in bulk, they usually buy cheap, short sparklers, and guess what? They almost always buy the silver ones!
Do yourselves a favour and invest a little bit more on decent sparklers or you’ll be disappointed with the results.
Here’s that link one last time!
6. Get loads of sparklers!
Sparklers are like confetti. You should always get more than you think you’ll need. Everyone will want to get involved, and the more you have, the better. I usually say to aim for between 40-50 people with sparklers to get the best results.
7. Get loads of lighters!
In order to give you as much time as possible for the photo, you need all the sparklers lit as quickly as possible. So the more lighters you have, the more time you’ll have for the photos.
I recommend wind-proof lighters. They’re like little blowtorches designed for camping so they light first time pretty much every time and they’re good for any weather. You also just press the button to light them, so even your drunkest guest will be able to use them! They’re relatively cheap and can be bought in multipacks in Poundland.
Get at least 10, preferably 15. Pass them around with the sparklers so they’re nice and spread out amongst your guests before anyone starts sparking up.
8. Get a confident photographer
As I’ve said above, it can be a logistical challenge to organise. People are excited, and loud, and you need someone who can take charge and organise it all. If your photographer is more of a wallflower type, I’d recommend delegating the organising to a confident Best Man or Maid of Honour.
It’s also a bit of a tricky shot to set up technically as the light settings are different, and it does take practice to get right. So just be aware that a fledgling photographer might not be able to set their camera up properly to get the kind of shot you’re hoping for.
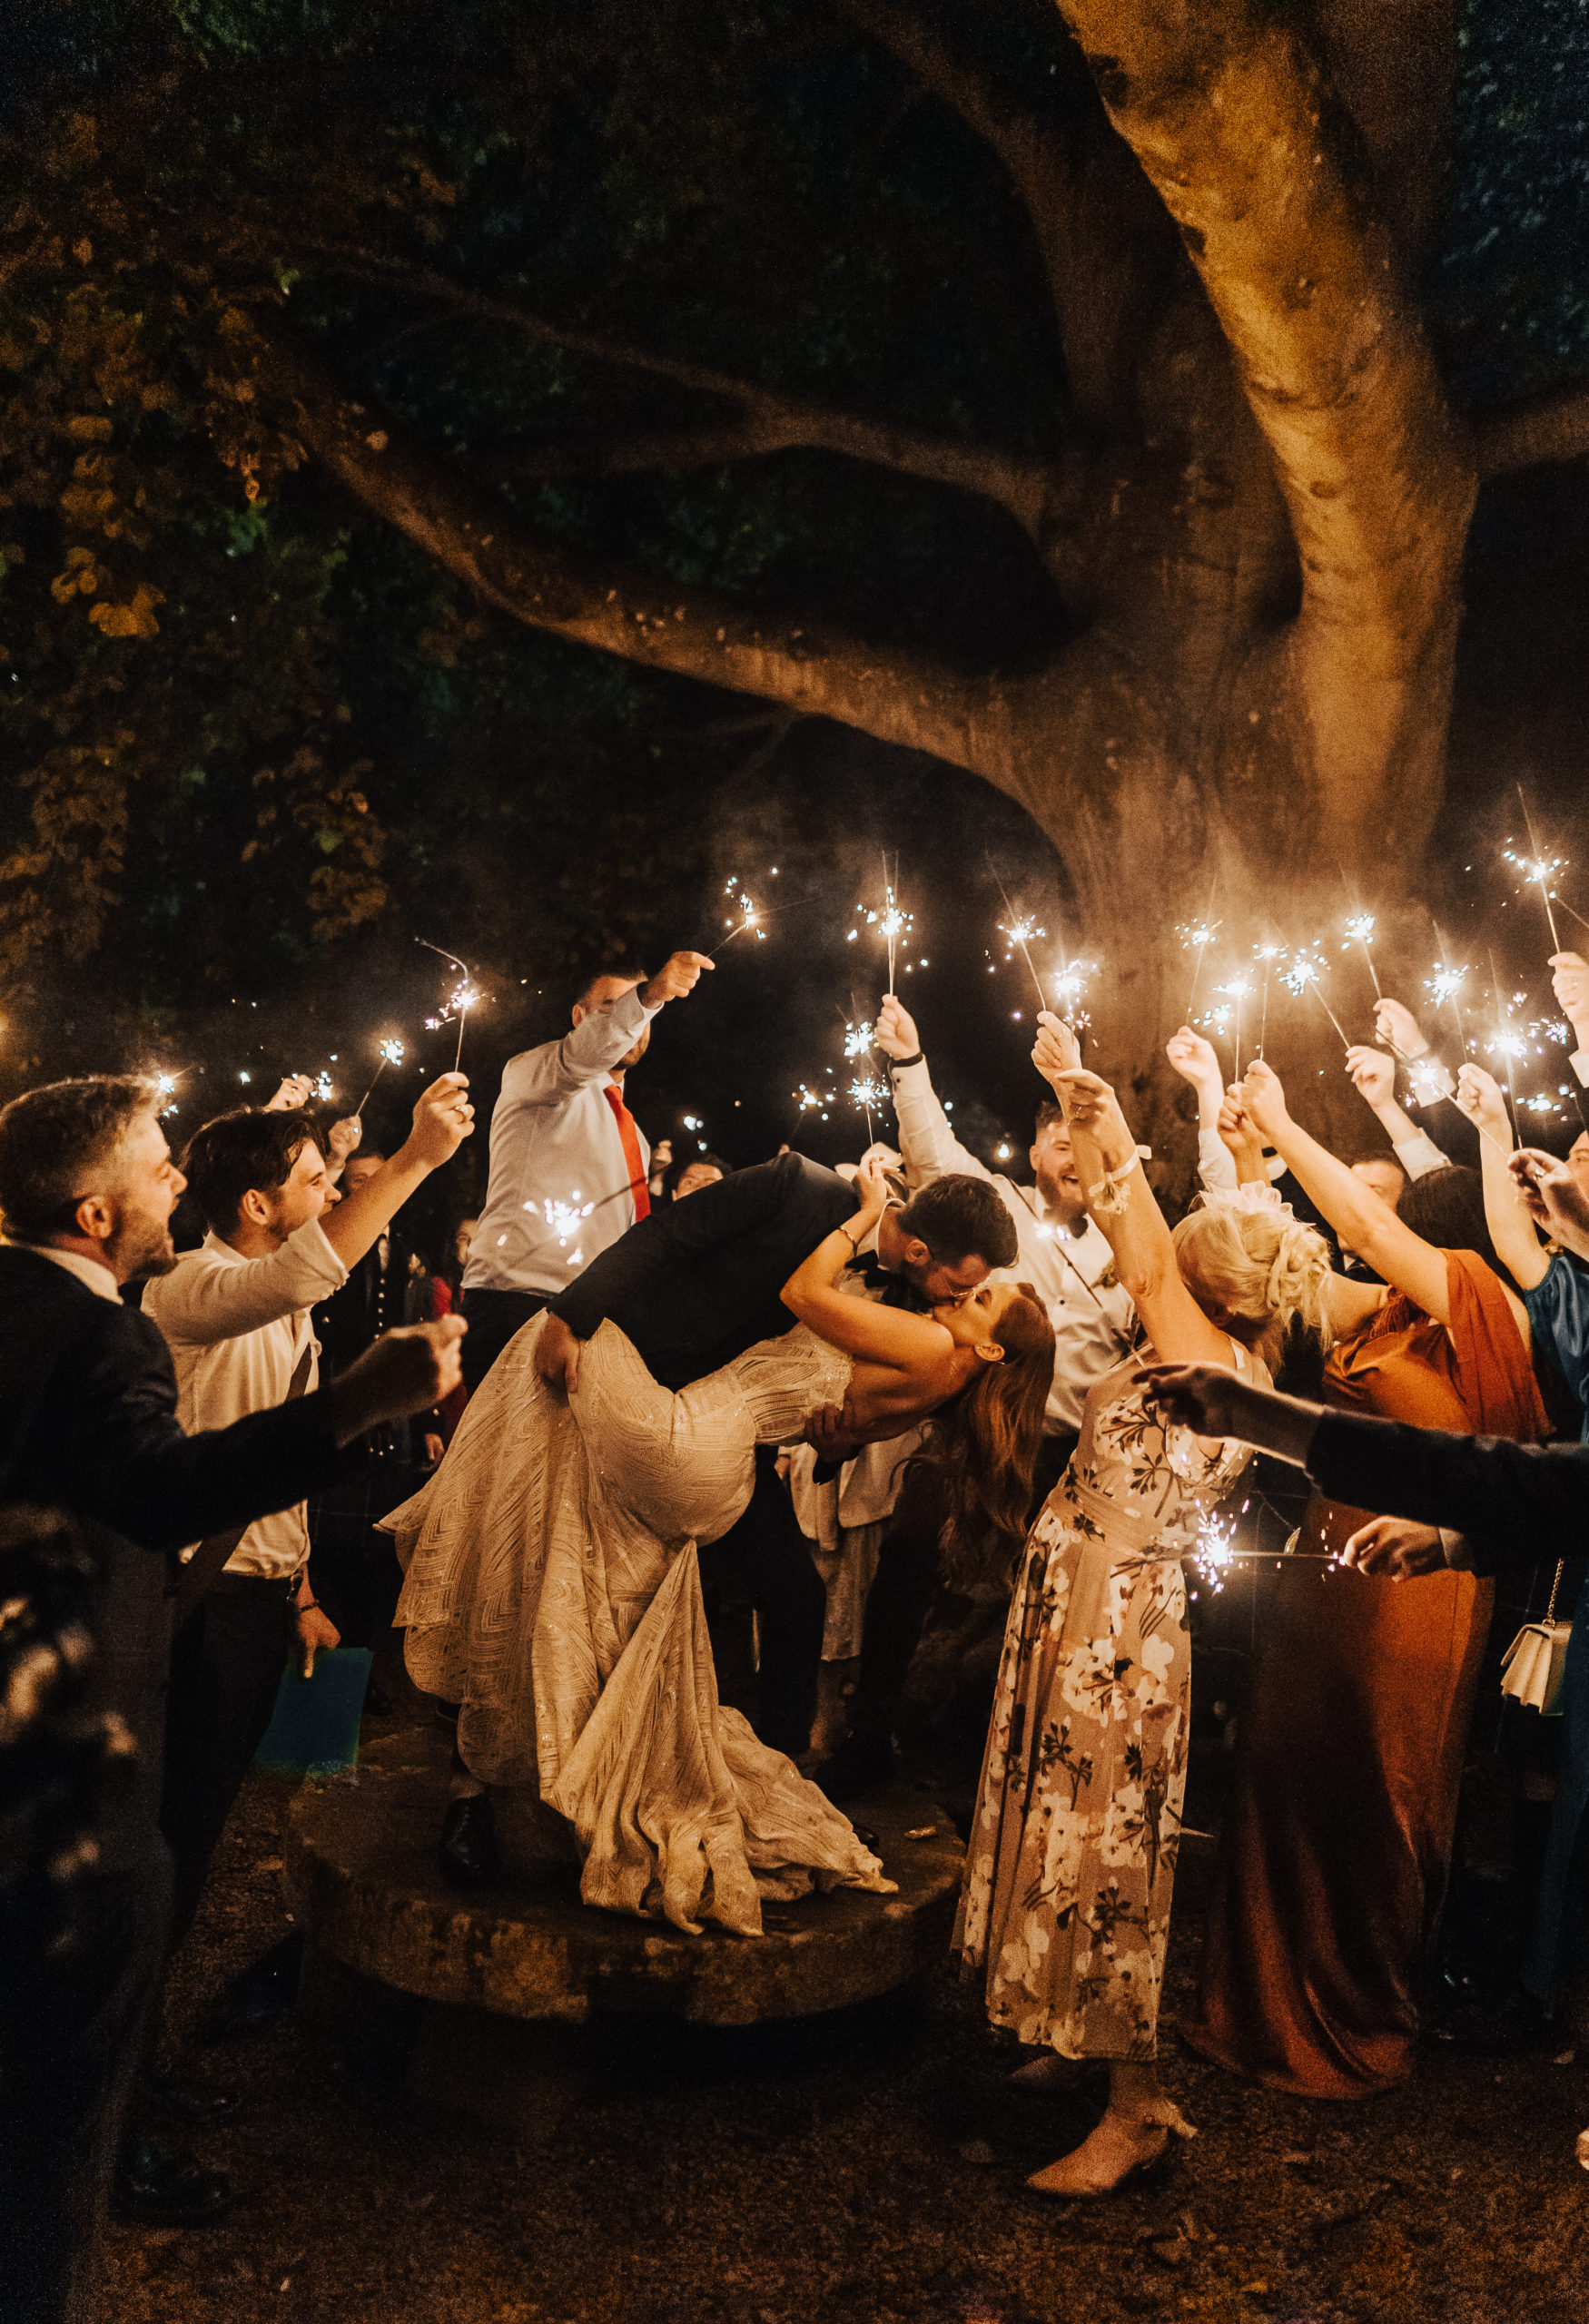
9. Choose your pose
There are two popular ways of doing it. There’s no right or wrong way, it’s completely up to you which you’d prefer. Check out your options and let myself (or whoever your photographer is) know which kind of shot you’d like so it’s all sorted on the day.
The tunnel (guard of honour)
Have your guests stand in two lines (around 20 on each side) with an aisle down the middle, holding their sparklers overhead to form a tunnel. Then you can walk down it, dance, run, whatever you’d like. And then you can do the ‘Hollywood’ kiss at the end, which always makes for an epic shot!
Static shot

Have your photographer position your guests with you (the couple) in the middle. Again, with longer sparklers you’ll have a chance to do a few different poses.
There are pros and cons of both. Here are some examples of both so you can see which one you’d prefer.
Sparkler shots are an amazing part of any wedding day. Guests always love getting involved, and you always end up with an awesome photo, filled with fun, energy and laughter. I hope this has helped, and wish you a wonderful wedding day and happy sparkling!

